Fine-Tune Your Audio: The Ultimate Guide to Using an Equalizer on Your Chromebook
Chromebooks have become increasingly popular for their simplicity, security, and affordability. While they excel in many areas, audio customization isn’t always their strongest suit. However, customizing your audio experience with an equalizer on your Chromebook is entirely possible and can significantly enhance how you enjoy music, podcasts, and other audio content. This comprehensive guide will walk you through everything you need to know about using an equalizer on your Chromebook, from understanding what an equalizer does to installing and configuring one.
Understanding Audio Equalization
Before diving into the specifics of using an equalizer on your Chromebook, it’s essential to understand what an equalizer actually does. An equalizer is an audio processing tool that allows you to adjust the volume of different frequency ranges within an audio signal. These frequency ranges are typically divided into bands, such as bass, midrange, and treble. By boosting or cutting specific frequency bands, you can shape the overall sound of your audio to better suit your preferences or the characteristics of your listening environment.
Think of it like adjusting the colors on a TV screen. Just as you can tweak the brightness, contrast, and saturation of different colors, an equalizer lets you fine-tune the balance of different frequencies in your audio. This can be particularly useful if you find that your Chromebook’s speakers sound tinny, muddy, or otherwise unbalanced. With the right equalizer settings, you can compensate for these deficiencies and achieve a more pleasing and accurate sound.
Why Use an Equalizer on a Chromebook?
There are several compelling reasons to consider using an equalizer on your Chromebook:
- Improved Audio Quality: The most obvious benefit is the potential for improved audio quality. By adjusting the equalizer settings, you can tailor the sound to your liking, making music, podcasts, and other audio content sound clearer, richer, and more balanced.
- Compensation for Poor Speakers: Many Chromebooks come with less-than-stellar speakers. An equalizer can help compensate for the limitations of these speakers by boosting frequencies that are lacking or cutting frequencies that are overemphasized.
- Personalized Listening Experience: Everyone has different preferences when it comes to audio. An equalizer allows you to create a personalized listening experience that caters to your individual tastes. Whether you prefer a bass-heavy sound for electronic music or a more balanced sound for classical music, an equalizer can help you achieve your desired sound.
- Hearing Correction: An equalizer can be a helpful tool for individuals with mild hearing loss or specific hearing sensitivities. By adjusting the equalizer settings, you can compensate for these issues and improve your ability to hear certain frequencies.
Methods for Implementing an Equalizer on Your Chromebook
While Chromebooks don’t typically come with a built-in system-wide equalizer, there are several ways to add this functionality. Here are the most common methods:
Using Audio Equalizer Extensions
One of the easiest ways to add an equalizer to your Chromebook is by using a Chrome extension. Several audio equalizer extensions are available in the Chrome Web Store, offering a range of features and customization options. These extensions typically work by intercepting the audio output from your Chromebook and applying the equalizer settings before sending the audio to your speakers or headphones.
Some popular audio equalizer extensions for Chrome include:
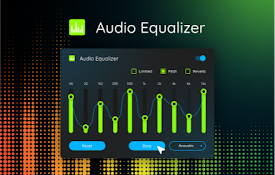
- Audio Equalizer: A straightforward and user-friendly extension that offers a variety of preset equalizer settings, as well as the ability to create your own custom settings.
- EQ Audio Equalizer: Another popular extension that provides a range of preset equalizer settings and the ability to fine-tune individual frequency bands. It also includes a visualizer that displays the audio spectrum in real-time.
- Chrome Audio EQ: A more advanced extension that offers a wider range of frequency bands and more precise control over the equalizer settings. It also includes a built-in preamplifier that can boost the overall volume of your audio.
To install an audio equalizer extension, simply visit the Chrome Web Store, search for the extension you want to install, and click the “Add to Chrome” button. Once the extension is installed, you can typically access it by clicking on its icon in the Chrome toolbar.
Utilizing Web-Based Equalizers
Another option for using an equalizer on your Chromebook is to utilize a web-based equalizer. These equalizers are typically accessed through a website and work by processing the audio within your web browser. While web-based equalizers may not be as convenient as Chrome extensions, they can be a good option if you only need to use an equalizer occasionally or if you don’t want to install an extension.
To use a web-based equalizer, simply visit the website and upload the audio file you want to equalize. The equalizer will then process the audio and allow you to adjust the frequency bands to your liking. Once you’re satisfied with the settings, you can download the equalized audio file.
Leveraging App-Specific Equalizers
Many media players and streaming apps include built-in equalizers that you can use to customize the audio output. For example, popular music streaming services like Spotify and YouTube Music often have equalizer settings within their apps. If you primarily listen to audio through a specific app, this can be the easiest way to access equalizer functionality.
To access the equalizer settings within an app, look for an option labeled “Equalizer,” “Audio Settings,” or something similar. The location of these settings will vary depending on the app, but they are typically found in the app’s settings menu.
Configuring Your Equalizer Settings
Once you’ve installed an equalizer extension or found an app with built-in equalizer functionality, the next step is to configure the settings to your liking. Here are some tips for getting the most out of your equalizer:
- Start with Presets: Most equalizers come with a variety of preset settings that are designed for different genres of music or listening scenarios. Start by experimenting with these presets to see if any of them sound good to you.
- Adjust Individual Frequency Bands: If none of the presets sound quite right, you can try adjusting the individual frequency bands yourself. This can be a bit more time-consuming, but it allows you to fine-tune the sound to your exact preferences.
- Use Your Ears: The most important thing to remember when configuring your equalizer is to use your ears. Listen carefully to the audio and adjust the settings until it sounds good to you. There’s no right or wrong way to set an equalizer, so don’t be afraid to experiment.
- Consider Your Listening Environment: The ideal equalizer settings will vary depending on your listening environment. For example, if you’re listening in a noisy environment, you may want to boost the midrange frequencies to make vocals and other instruments more audible.
- Don’t Overdo It: It’s tempting to crank up the bass or treble to extreme levels, but this can often result in a distorted or unnatural sound. Try to make subtle adjustments and avoid overdoing it.
Troubleshooting Common Equalizer Issues
While using an equalizer on your Chromebook is generally straightforward, you may encounter some issues along the way. Here are some common problems and how to fix them:
- The Equalizer Isn’t Working: If the equalizer doesn’t seem to be having any effect on the audio, make sure that it’s enabled and that the correct audio output device is selected. Also, try restarting your Chromebook or reinstalling the equalizer extension.
- The Audio Sounds Distorted: If the audio sounds distorted after applying equalizer settings, try reducing the amount of boost you’re applying to the frequency bands. Also, make sure that the preamplifier isn’t set too high.
- The Equalizer Is Draining Battery Life: Some equalizer extensions can consume a significant amount of battery life. If you notice that your Chromebook’s battery is draining faster than usual, try disabling the equalizer extension when you’re not using it.
- Compatibility Issues: Occasionally, an equalizer extension might conflict with certain websites or apps. If you experience problems with audio playback on a specific website or app, try disabling the equalizer extension temporarily to see if that resolves the issue.
Conclusion
Using an equalizer on your Chromebook can significantly enhance your audio experience. Whether you’re looking to compensate for poor speakers, personalize your listening experience, or simply fine-tune the sound to your liking, an equalizer is a valuable tool to have. By following the steps outlined in this guide, you can easily install and configure an equalizer on your Chromebook and start enjoying better audio today. Experiment with different settings and find what sounds best to you. With a little bit of tweaking, you can transform your Chromebook into a portable audio powerhouse.
[See also: How to Improve Chromebook Performance]
[See also: Best Audio Editing Apps for Chromebook]
[See also: Understanding Audio Frequencies]
