Building a Wood Deck Over Concrete Patio: A Comprehensive Guide
Enhancing your outdoor living space is a worthwhile investment. A popular and aesthetically pleasing option is building a wood deck over a concrete patio. This project not only improves the look of your backyard but also adds value to your home. This comprehensive guide provides a step-by-step approach to successfully building a wood deck over concrete patio, ensuring a durable and beautiful result.
Why Build a Wood Deck Over Concrete?
Before diving into the construction process, let’s examine the benefits of building a wood deck over concrete patio:
- Aesthetic Appeal: Wood decks offer a natural, warm look that can transform a plain concrete slab into an inviting outdoor space.
- Comfort: Wood is generally more comfortable to walk on than concrete, especially during hot summer months.
- Increased Home Value: A well-built deck can significantly increase your property value.
- Improved Drainage: A deck allows water to drain away from the surface, preventing puddles and potential damage to the concrete.
- Hides Imperfections: If your concrete patio has cracks or other blemishes, a deck can effectively conceal them.
Planning and Preparation
Proper planning is crucial for a successful deck-building project. Here’s what you need to consider:
Permits and Regulations
Check with your local building department to determine if you need a permit to build a wood deck over concrete patio. Regulations vary depending on your location, and it’s essential to comply with all requirements to avoid potential fines or legal issues. Consider factors such as deck height and proximity to property lines.
Design and Layout
Sketch out your deck design, considering the size, shape, and orientation. Think about how you’ll use the space and incorporate features like built-in seating, planters, or a grill area. Ensure the design complements your home’s architecture and landscaping. Determine the direction you want the deck boards to run. This will influence the layout of your support structure.
Materials and Tools
Gather all the necessary materials and tools before starting construction. Here’s a list of essential items:
- Lumber: Choose pressure-treated lumber for the framing and decking material. Consider composite decking for enhanced durability and low maintenance.
- Fasteners: Use galvanized or stainless-steel screws and nails to prevent corrosion.
- Shims: Plastic shims are necessary to create a level surface.
- Concrete Anchors: Use concrete anchors to secure the ledger board to the concrete patio, if applicable.
- Tools: You’ll need a circular saw, drill, level, measuring tape, hammer, safety glasses, and work gloves.
- Moisture Barrier: A plastic or rubber membrane to protect the wood from moisture wicking up from the concrete.
Step-by-Step Construction Guide
Follow these steps to build a wood deck over concrete patio:
Prepare the Concrete Surface
Clean the concrete patio thoroughly to remove dirt, debris, and any loose material. Use a pressure washer or scrub brush and detergent to ensure a clean surface. Repair any cracks or damage to the concrete before proceeding. This provides a stable base for your deck.
Install a Moisture Barrier
Place a moisture barrier over the concrete surface to prevent moisture from damaging the wood. Overlap the edges of the barrier and secure it with tape or construction adhesive. This barrier is crucial for extending the life of your deck. Consider using a dimpled membrane designed for this purpose as it allows for better airflow under the deck.
Build the Support Structure
The support structure consists of a framework of pressure-treated lumber that will support the decking. This is often referred to as a sleeper system. Construct the frame according to your design, ensuring it is level and properly spaced. The spacing of the joists will depend on the thickness of the decking material. Typically, joists are spaced 12 to 16 inches apart. Create a grid pattern with the lumber, ensuring all pieces are securely fastened together. Use shims to level the frame as needed. Ensuring the frame is level is crucial for a level deck surface.
Attach the Ledger Board (If Applicable)
If your deck will be attached to your house, install a ledger board against the wall. The ledger board is a piece of lumber that’s securely fastened to the house and provides support for one side of the deck. Use concrete anchors to attach the ledger board to the concrete foundation. Ensure the ledger board is level and properly flashed to prevent water damage to your home. This step might not be necessary if your deck is a freestanding structure.
Install the Decking
Once the support structure is in place, it’s time to install the decking. Start by laying the first row of decking boards along the edge of the frame. Use screws to fasten the boards to the joists, maintaining consistent spacing between the boards. Use spacers to ensure uniform gaps. Continue laying boards, row by row, until the entire deck is covered. Consider using hidden fastener systems for a clean, professional look. Regularly check for level as you install the decking.
Add Finishing Touches
After the decking is installed, add the finishing touches to complete your project. Install trim boards around the perimeter of the deck to conceal the edges. Add railings or stairs if needed. Apply a sealant or stain to protect the wood from the elements and enhance its appearance. Consider adding lighting for nighttime use. Remember to thoroughly inspect all fasteners to ensure they are secure.
Maintenance and Care
Proper maintenance is essential for extending the life of your wood deck. Here are some tips:
- Regular Cleaning: Clean your deck regularly with a brush and mild detergent to remove dirt and debris.
- Sealing and Staining: Apply a sealant or stain every one to two years to protect the wood from moisture and UV damage.
- Inspect for Damage: Check your deck regularly for signs of damage, such as cracks, rot, or loose fasteners.
- Clear Debris: Remove leaves and other debris from the deck surface to prevent moisture buildup and potential rot.
- Address Issues Promptly: Repair any damage as soon as possible to prevent it from worsening.
Choosing the Right Materials for Your Deck
The longevity and appearance of your deck heavily depend on the materials you select. Here’s a breakdown of popular options:
Pressure-Treated Lumber
This is a cost-effective and readily available option. Pressure-treated lumber is resistant to rot and insect damage, making it suitable for outdoor use. However, it requires regular maintenance, including cleaning, sealing, and staining, to prevent warping and cracking.
Composite Decking
Composite decking is made from a blend of wood fibers and recycled plastic. It offers excellent durability and low maintenance. Composite decking is resistant to fading, staining, and scratching. It is also available in a variety of colors and textures, allowing you to customize the look of your deck. While more expensive than pressure-treated lumber, the long-term cost savings can be significant.
Hardwood Decking
Hardwood decking, such as cedar, redwood, and ipe, offers a beautiful and natural look. These woods are naturally resistant to rot and insect damage. However, they require regular maintenance, including oiling or sealing, to maintain their appearance and prevent weathering. Hardwood decking is a premium option that adds elegance and value to your home.
Design Considerations for Your Deck
Beyond the basic construction, consider these design elements to enhance your deck:
- Railings: Choose railings that complement your home’s style and provide safety. Options include wood, metal, and composite railings.
- Stairs: If your deck is elevated, incorporate stairs for easy access. Ensure the stairs are code-compliant and provide a safe and comfortable transition.
- Lighting: Add lighting to create a warm and inviting atmosphere. Options include deck lights, string lights, and spotlights.
- Built-In Seating: Incorporate built-in seating to maximize space and create a comfortable lounging area.
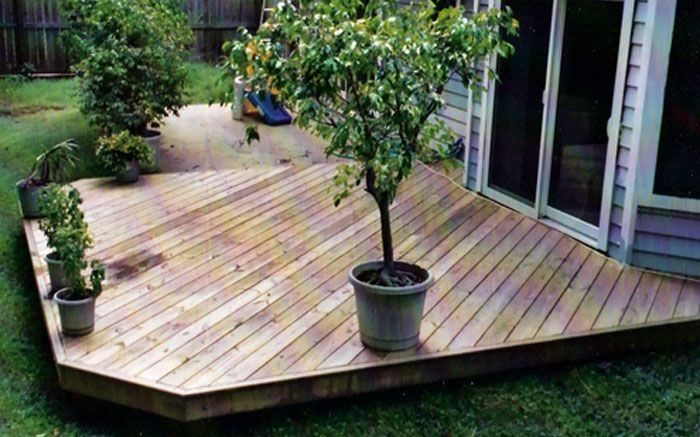
- Planters: Add planters to bring greenery to your deck and create a more natural environment.
Troubleshooting Common Issues
Even with careful planning, you may encounter issues during the deck-building process. Here are some common problems and how to address them:
- Uneven Surface: If your concrete patio is uneven, use shims to level the support structure.
- Water Pooling: Ensure proper drainage by creating a slight slope in the deck surface.
- Loose Fasteners: Regularly check and tighten any loose screws or nails.
- Rot or Decay: Replace any damaged or rotting wood immediately to prevent further damage.
The Joy of a New Deck
Building a wood deck over concrete patio is a rewarding project that can significantly enhance your outdoor living space. By following these steps and taking the time to plan and prepare properly, you can create a beautiful and durable deck that you and your family will enjoy for years to come. Remember to prioritize safety, use high-quality materials, and maintain your deck regularly to ensure its longevity. A new deck isn’t just an addition to your home; it’s an investment in your lifestyle. Consider features like built-in benches or a pergola to further customize the space. [See also: Deck Maintenance Tips] and [See also: Choosing the Right Decking Material].
