DIY Acrylic Pouring Medium: A Comprehensive Guide to Saving Money and Mastering Fluid Art
Acrylic pouring, also known as fluid art, has exploded in popularity in recent years, captivating artists and hobbyists alike with its mesmerizing patterns and vibrant colors. However, the cost of commercially produced acrylic pouring mediums can quickly add up, especially for those experimenting and learning the technique. This is where the beauty of creating your own DIY acrylic pouring medium comes in. By crafting your own medium, you not only save money but also gain a deeper understanding of the materials you’re working with, allowing for greater control and customization in your artwork.
This comprehensive guide will walk you through everything you need to know about making your own DIY acrylic pouring medium, from understanding the purpose of the medium to exploring various recipes and troubleshooting common issues. Whether you’re a beginner just starting your fluid art journey or an experienced pourer looking to refine your techniques and cut costs, this article will provide you with the knowledge and tools you need to succeed.
Understanding the Role of Pouring Medium
Before diving into the recipes, it’s crucial to understand what a pouring medium actually does. The primary function of an acrylic pouring medium is to thin the acrylic paint, making it flow smoothly and evenly across the canvas without cracking or crazing as it dries. Without a proper medium, acrylic paint tends to be too thick, leading to uneven pours, trapped air bubbles, and a brittle finish. A good DIY acrylic pouring medium will ensure consistent flow, enhance color vibrancy, and promote the formation of cells, which are those captivating, marble-like effects that make fluid art so unique.
A well-formulated medium also improves the paint’s adhesion to the canvas, preventing it from peeling or flaking off over time. It increases the open time of the paint, allowing you more time to manipulate the pour and create your desired effects. Finally, it should create a durable, glossy finish that protects the artwork from dust and UV damage. Therefore, understanding the function of the medium is crucial when selecting the ingredients for your DIY acrylic pouring medium recipe.
Benefits of Making Your Own Acrylic Pouring Medium
There are several compelling reasons to consider making your own DIY acrylic pouring medium:
- Cost Savings: Commercial pouring mediums can be expensive, especially if you’re pouring frequently or working on large-scale projects. Making your own medium significantly reduces the cost per pour.
- Customization: By making your own medium, you have complete control over the ingredients and their proportions, allowing you to tailor the medium to your specific needs and preferences. For example, you can adjust the gloss level, viscosity, and drying time.
- Experimentation: Creating your own medium encourages experimentation and a deeper understanding of the materials you’re working with. This can lead to new techniques and unique artistic styles.
- Availability: You can make your own medium using readily available household ingredients, eliminating the need to order specialized products online or visit art supply stores.
- Control over Ingredients: You know exactly what’s going into your medium. This is helpful for artists with sensitivities to certain chemicals found in commercial products.
Essential Ingredients for DIY Acrylic Pouring Medium
While there are many variations on DIY acrylic pouring medium recipes, some ingredients are more commonly used than others. Here’s a breakdown of the most essential ingredients and their roles:
- Acrylic Paint: This is the foundation of your artwork. Use artist-grade acrylic paints for the best results, as they contain higher pigment concentrations and offer better lightfastness. Student-grade paints can be used for practice, but their colors may fade over time.
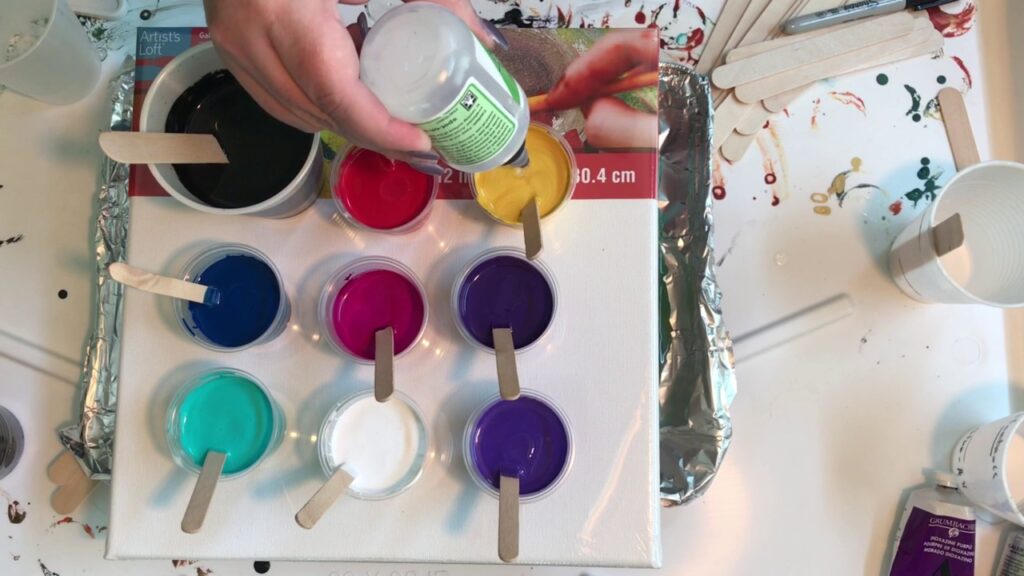
- Clear Glue (PVA Glue): Clear glue acts as a binder and extender, thinning the paint and improving its flow. It also adds flexibility to the dried paint film, reducing the risk of cracking. Look for PVA glue that dries clear and is acid-free.
- Distilled Water: Distilled water is used to adjust the viscosity of the medium. It’s important to use distilled water rather than tap water, as tap water can contain minerals and impurities that can affect the paint’s consistency and drying time.
- Floetrol: Floetrol is a paint conditioner that is often used in DIY acrylic pouring medium. It helps to reduce air bubbles, improve flow, and create a smooth, even surface. It also extends the open time of the paint, giving you more time to manipulate the pour.
- Silicone Oil (Optional): Silicone oil is used to create cells in acrylic pours. It repels the paint around it, creating small, marble-like effects. Use silicone oil sparingly, as too much can cause the paint to separate or crack.
Popular DIY Acrylic Pouring Medium Recipes
Here are a few popular DIY acrylic pouring medium recipes to get you started. Remember to experiment with the ratios to find what works best for your style and the specific paints you are using.
Recipe 1: Glue-Based Medium
- 1 part Acrylic Paint
- 2 parts Clear PVA Glue
- 1 part Distilled Water
Mix the ingredients thoroughly in a cup or container. Add more water if needed to achieve a honey-like consistency. This is a simple and cost-effective DIY acrylic pouring medium recipe, perfect for beginners.
Recipe 2: Floetrol-Based Medium
- 1 part Acrylic Paint
- 2 parts Floetrol
- Small amount of Distilled Water (to adjust consistency)
Combine the paint and Floetrol, mixing well. Add water gradually until you reach the desired consistency. This recipe is known for producing vibrant colors and excellent cell formation. Many artists consider this their go-to DIY acrylic pouring medium.
Recipe 3: Glue and Floetrol Combination
- 1 part Acrylic Paint
- 1 part Clear PVA Glue
- 1 part Floetrol
- Small amount of Distilled Water (to adjust consistency)
This recipe combines the benefits of both glue and Floetrol, providing good flow, flexibility, and cell formation. Adjust the water content to achieve your desired viscosity. This DIY acrylic pouring medium is versatile and works well with a variety of acrylic paints.
Recipe 4: All-Purpose Medium
- 1 part Acrylic Paint
- 2 parts Liquitex Pouring Medium (This is a commercially available medium, but used in a smaller proportion to save costs)
- 0.5 part Clear PVA Glue
- 0.5 part Distilled Water
This recipe uses a small amount of commercial pouring medium blended with PVA glue and distilled water to reduce the overall cost while still maintaining quality. This can be a good option for those looking for a balance between cost-effectiveness and performance. It’s a slightly less ‘DIY acrylic pouring medium‘ approach, but still saves money.
Tips for Mixing Your DIY Acrylic Pouring Medium
Here are some helpful tips to ensure your DIY acrylic pouring medium is mixed properly:
- Use Clean Containers: Always use clean cups, containers, and mixing tools to avoid contamination.
- Mix Thoroughly: Ensure all ingredients are fully incorporated to avoid lumps or inconsistencies in the pour. A popsicle stick or silicone spatula works well.
- Avoid Over-Mixing: Over-mixing can introduce air bubbles into the medium. Mix gently but thoroughly.
- Let it Rest: Allow the mixed medium to rest for a few minutes before pouring to allow any trapped air bubbles to rise to the surface.
- Consistency is Key: Aim for a honey-like consistency. The mixture should flow smoothly off your mixing stick in a continuous stream.
- Test Before Committing: Always test a small amount of your mixed paint on a scrap canvas before committing to a large pour. This will allow you to adjust the consistency and color ratios as needed.
Troubleshooting Common Issues with DIY Acrylic Pouring Medium
Even with the best recipes and techniques, you may encounter some issues when making your own DIY acrylic pouring medium. Here are some common problems and their solutions:
- Cracking: Cracking can occur if the paint layer is too thick or if the medium is too weak. Try adding more glue or Floetrol to your mixture, or apply thinner layers of paint.
- Crazing: Crazing is the formation of fine lines on the surface of the paint. This can be caused by using incompatible ingredients or by rapid drying. Ensure all your ingredients are compatible and allow the paint to dry slowly in a cool, dry place.
- Air Bubbles: Air bubbles can be introduced during mixing. Let the mixture rest before pouring and gently tap the canvas after pouring to release any trapped air.
- Poor Cell Formation: If you’re not getting the desired cell formation, try adding a small amount of silicone oil to your mixture. Experiment with different brands and concentrations of silicone oil to find what works best.
- Uneven Flow: Uneven flow can be caused by using a medium that is too thick or too thin. Adjust the water content to achieve the desired consistency.
- Paint Separation: If the paint separates after pouring, it could be due to using too much silicone oil or using incompatible ingredients. Reduce the amount of silicone oil or try a different recipe.
Safety Precautions
When working with acrylic paints and pouring mediums, it’s essential to take certain safety precautions:
- Ventilation: Work in a well-ventilated area to avoid inhaling fumes.
- Protective Gear: Wear gloves to protect your skin from paint and chemicals.
- Eye Protection: Wear safety glasses or goggles to protect your eyes from splashes.
- Clean Up: Clean up spills immediately with soap and water.
- Storage: Store paints and mediums in a cool, dry place away from children and pets.
Conclusion
Creating your own DIY acrylic pouring medium is a rewarding and cost-effective way to explore the world of fluid art. By understanding the role of the medium and experimenting with different recipes, you can unlock new creative possibilities and achieve stunning results. Don’t be afraid to experiment and adapt these recipes to your own preferences and artistic style. Remember, the most important thing is to have fun and enjoy the process! With a little practice and patience, you’ll be creating mesmerizing acrylic pours in no time. Embrace the freedom and savings that come with crafting your own DIY acrylic pouring medium and watch your fluid art flourish. By taking control of your materials, you’ll gain a deeper appreciation for the art form and unlock a world of creative potential. Whether you’re aiming for vibrant cells, smooth gradients, or unique textures, mastering the art of DIY acrylic pouring medium is the key to achieving your artistic vision. So gather your supplies, experiment with different recipes, and let your creativity flow!
[See also: Acrylic Pouring Techniques for Beginners]
[See also: Best Acrylic Paints for Pouring]
[See also: How to Create Cells in Acrylic Pouring]
