DIY Wood Post and Rail Fence: A Comprehensive Guide to Building Your Own
A DIY wood post and rail fence is a classic and cost-effective way to add charm and security to your property. Whether you’re looking to define your property lines, keep livestock contained, or simply enhance your landscape, building your own wood post and rail fence can be a rewarding project. This comprehensive guide will walk you through every step of the process, from planning and material selection to installation and maintenance, ensuring you create a durable and aesthetically pleasing DIY wood post and rail fence.
Planning Your DIY Wood Post and Rail Fence
Before you even think about picking up a shovel, careful planning is crucial. This stage sets the foundation for a successful fence-building project. Key considerations include:
- Purpose of the Fence: What are you trying to achieve with this fence? Is it purely decorative, or do you need it to contain animals or provide security? The purpose will influence the height, spacing, and overall strength of your wood post and rail fence.
- Property Lines: Accurately identify your property lines. This is essential to avoid disputes with neighbors. Consult your property survey and, if necessary, hire a surveyor to mark the boundaries.
- Local Regulations and Permits: Check with your local municipality for any zoning regulations or permit requirements for fence construction. Failure to comply can result in fines and delays.
- Terrain and Obstacles: Assess the terrain where you plan to build the fence. Are there slopes, rocks, or underground utilities? These factors will influence your post placement and fence design.
- Fence Layout: Determine the desired length and configuration of your fence. Mark the location of each post with stakes and string. This will give you a visual representation of the finished product.
Choosing the Right Materials for Your Wood Post and Rail Fence
The longevity and appearance of your DIY wood post and rail fence depend on the materials you select. Here’s a breakdown of common options:
Wood Types
- Pressure-Treated Pine: The most common and affordable option. Pressure treatment protects the wood from rot and insect damage, making it suitable for ground contact.
- Cedar: A naturally rot-resistant wood with a beautiful reddish-brown color. Cedar is more expensive than pine but requires less maintenance.
- Black Locust: Exceptionally durable and naturally resistant to decay. Black locust is a premium option that can last for decades without treatment.
- Other Options: Cypress, redwood, and other hardwoods can also be used, depending on availability and budget.
Post and Rail Dimensions
- Posts: Typically 4×4 or 6×6 inches, depending on the height and strength requirements of the fence. Posts should be long enough to extend at least 2-3 feet below ground level.
- Rails: Common sizes include 2×4, 2×6, and 1×6 inches. The number of rails will depend on the height of the fence and the spacing between them.
Fasteners
- Screws: Deck screws or exterior-grade wood screws are ideal for attaching rails to posts. Choose screws that are long enough to penetrate deeply into the wood.
- Nails: Galvanized nails can also be used, but screws provide a stronger and more durable connection.
- Hardware: Consider using metal brackets or connectors to reinforce the joints between posts and rails.
Tools You’ll Need for Your DIY Wood Post and Rail Fence Project
Having the right tools will make the job much easier and more efficient. Here’s a list of essential tools:
- Post Hole Digger or Auger: For digging the post holes. A power auger can save a lot of time and effort, especially if you have many holes to dig.
- Shovels: For digging and backfilling around the posts.
- Level: To ensure the posts are plumb.
- Measuring Tape: For accurate measurements.
- Circular Saw or Hand Saw: For cutting the rails to length.
- Drill or Impact Driver: For driving screws.
- Hammer: For driving nails (if using).
- String Line: To keep the fence straight.
- Wheelbarrow: For transporting materials.
- Safety Glasses and Gloves: For personal protection.
Step-by-Step Guide to Building Your DIY Wood Post and Rail Fence
Now that you’ve planned your fence and gathered your materials, it’s time to start building. Follow these steps for a successful installation:
Step 1: Mark the Post Locations
Use your layout plan to mark the exact location of each post with stakes. Ensure the posts are evenly spaced, typically 8-10 feet apart. Use a string line to ensure the posts are aligned in a straight line.
Step 2: Dig the Post Holes
Dig the post holes to the required depth, typically 2-3 feet below ground level. The diameter of the hole should be at least three times the width of the post. Use a post hole digger or power auger for this task.
Step 3: Set the Posts
Place each post in its hole and use a level to ensure it’s plumb. Backfill the hole with gravel and tamp it down firmly. Add concrete mix to the hole to provide additional stability. Slope the concrete away from the post to allow water to drain away.
Step 4: Attach the Rails
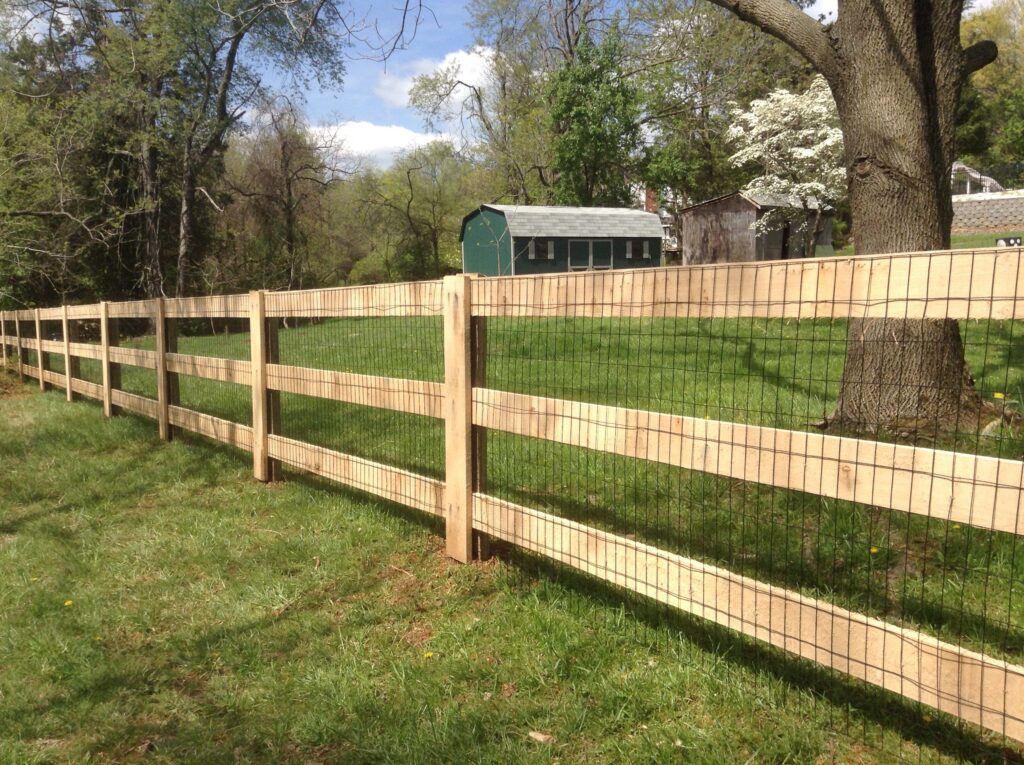
Once the concrete has set (usually 24-48 hours), you can start attaching the rails to the posts. Use screws or nails to secure the rails to the posts. Ensure the rails are level and evenly spaced. Overlap the rails at the posts for added strength.
Step 5: Add Finishing Touches
Once all the rails are in place, inspect the fence for any loose connections or imperfections. Apply a wood preservative or stain to protect the wood from the elements. Consider adding decorative post caps or other finishing touches to enhance the appearance of your fence. A well-maintained wood post and rail fence looks great for years to come.
Tips for a Successful DIY Wood Post and Rail Fence Project
- Start Small: If you’re new to fence building, start with a small section to get the hang of it.
- Get Help: Fence building is easier with a helper.
- Take Your Time: Don’t rush the process. Accurate measurements and careful installation will result in a more durable and aesthetically pleasing fence.
- Use Quality Materials: Investing in quality materials will pay off in the long run.
- Maintain Your Fence: Regularly inspect your fence for damage and make any necessary repairs. Apply a fresh coat of preservative or stain every few years to protect the wood.
Maintaining Your Wood Post and Rail Fence
Proper maintenance will significantly extend the life of your DIY wood post and rail fence. Here are some key maintenance tasks:
- Regular Inspections: Inspect your fence at least twice a year for signs of rot, insect damage, or loose connections.
- Cleaning: Remove dirt, debris, and mildew from the fence with a brush and mild detergent.
- Repairs: Repair any damaged or broken posts or rails promptly.
- Preservation: Apply a wood preservative or stain every few years to protect the wood from the elements.
- Weed Control: Keep weeds and vegetation away from the base of the fence to prevent moisture buildup and rot.
Cost Considerations for Your DIY Wood Post and Rail Fence
The cost of a DIY wood post and rail fence can vary depending on the materials you choose, the size of your project, and your location. Here’s a breakdown of typical costs:
- Materials: Expect to pay $5-$15 per linear foot for materials, depending on the type of wood and the size of the posts and rails.
- Tools: If you don’t already own the necessary tools, you may need to invest in them.
- Labor: If you hire someone to help you with the project, you’ll need to factor in labor costs.
Building a DIY wood post and rail fence is a project that provides a great sense of accomplishment. By carefully planning, selecting the right materials, and following these step-by-step instructions, you can create a beautiful and functional fence that will enhance your property for years to come. Remember to always prioritize safety and consult with local authorities regarding permits and regulations. This guide provides a solid foundation to get you started on your DIY wood post and rail fence adventure. [See also: Fence Repair Guide] [See also: Types of Wood Fences] [See also: How to Choose the Right Fence]
Alternatives to Wood Post and Rail Fences
While a wood post and rail fence offers a classic aesthetic, there are alternative fencing options to consider, each with its own advantages and disadvantages:
- Vinyl Fencing: Low-maintenance and durable, vinyl fences resist rot and insect damage. However, they can be more expensive than wood.
- Metal Fencing: Options like chain-link or wrought iron provide security and longevity. Chain-link is cost-effective but less aesthetically pleasing, while wrought iron is elegant but more expensive.
- Electric Fencing: Primarily used for livestock containment, electric fences are relatively inexpensive and easy to install.
- Wire Mesh Fencing: A versatile option suitable for gardens or pet enclosures. It’s relatively inexpensive and easy to install, but may not be as visually appealing as other options.
Enhancing Your DIY Wood Post and Rail Fence with Landscaping
Complement your new DIY wood post and rail fence with thoughtful landscaping to create a visually appealing and harmonious outdoor space. Consider planting flowers, shrubs, or climbing vines along the fence line to soften its appearance and add color and texture. Choose plants that are appropriate for your climate and soil conditions. Strategic landscaping can transform your fence from a simple boundary marker into an integral part of your landscape design.
Ultimately, building a DIY wood post and rail fence is a worthwhile investment in your property. With careful planning, quality materials, and a bit of elbow grease, you can create a fence that is both functional and beautiful, adding value and curb appeal to your home. Enjoy the process and the satisfaction of knowing you built it yourself!
