Easy Sharpie Tattoo Designs: Temporary Art for Creative Expression
Sharpie tattoos offer a fun and accessible way to experiment with body art without the commitment of permanent ink. Whether you’re looking to express yourself creatively, test out a design before getting a real tattoo, or simply enjoy a temporary aesthetic, easy Sharpie tattoo designs are an excellent option. This article explores the world of easy Sharpie tattoo designs, providing inspiration, tips, and safety guidelines to help you create your own stunning, temporary body art.
Why Choose Sharpie Tattoos?
Before diving into design ideas, let’s consider the advantages of opting for easy Sharpie tattoo designs:
- Temporary and Non-Permanent: The biggest draw is the impermanence. If you don’t like the design, it will fade over time. This is ideal for experimenting with different styles and placements.
- Cost-Effective: Sharpies are readily available and relatively inexpensive, making it a budget-friendly way to explore body art.
- Creative Freedom: You have complete control over the design process. You can draw freehand, use stencils, or collaborate with friends.
- No Pain Involved: Unlike traditional tattoos, there’s no pain or discomfort associated with applying a Sharpie tattoo.
- Great for Events and Parties: Easy Sharpie tattoo designs are perfect for parties, festivals, or any event where you want to add a touch of temporary flair.
Safety First: Choosing the Right Sharpies
While Sharpie tattoos are generally safe for temporary use, it’s crucial to select the right type of Sharpie. Avoid using permanent markers on your skin, as they contain harsh chemicals that can cause irritation or allergic reactions. Instead, opt for:
- Washable Markers: These are the safest option, as they are specifically designed for use on skin and are easily removed with soap and water.
- Skin-Safe Markers: Some brands offer markers specifically formulated for skin art. These are a good alternative if you want more vibrant colors than washable markers provide.
Always test the marker on a small, inconspicuous area of your skin before applying a larger design to ensure you don’t have an adverse reaction. If you experience any redness, itching, or swelling, discontinue use immediately.
Essential Supplies for Creating Sharpie Tattoos
To create stunning easy Sharpie tattoo designs, gather the following supplies:
- Sharpies (washable or skin-safe)
- Stencils (optional): Stencils can help you create precise and intricate designs.
- Rubbing Alcohol or Hand Sanitizer: To clean the skin before application.
- Cotton Balls or Pads: For applying rubbing alcohol.
- Baby Powder or Setting Spray: To help set the design and prolong its lifespan.
- Petroleum Jelly or Moisturizer: To outline the design and prevent smudging.
- Reference Images (optional): For inspiration and guidance.
Step-by-Step Guide to Applying a Sharpie Tattoo
Follow these steps to create your own easy Sharpie tattoo designs:
- Clean the Skin: Thoroughly clean the area where you’ll be applying the tattoo with rubbing alcohol or hand sanitizer. This removes oils and dirt, ensuring better adhesion.
- Outline the Design (Optional): If you’re using a stencil or freehand drawing, lightly outline the design with petroleum jelly or moisturizer. This will help prevent the Sharpie ink from spreading and creating blurry lines.
- Apply the Design: Carefully draw or trace the design onto your skin using your chosen Sharpie. If using a stencil, hold it firmly in place to prevent movement.
- Fill in the Design: Once the outline is complete, fill in any solid areas with the Sharpie. Use short, even strokes to avoid creating streaks.
- Let it Dry: Allow the ink to dry completely before touching or covering the design. This will help prevent smudging.
- Set the Design: Lightly dust the tattoo with baby powder or spray it with setting spray. This will help set the ink and prolong its lifespan.
Inspiration: Easy Sharpie Tattoo Design Ideas
Need some inspiration? Here are some easy Sharpie tattoo designs to get you started:
Simple Shapes
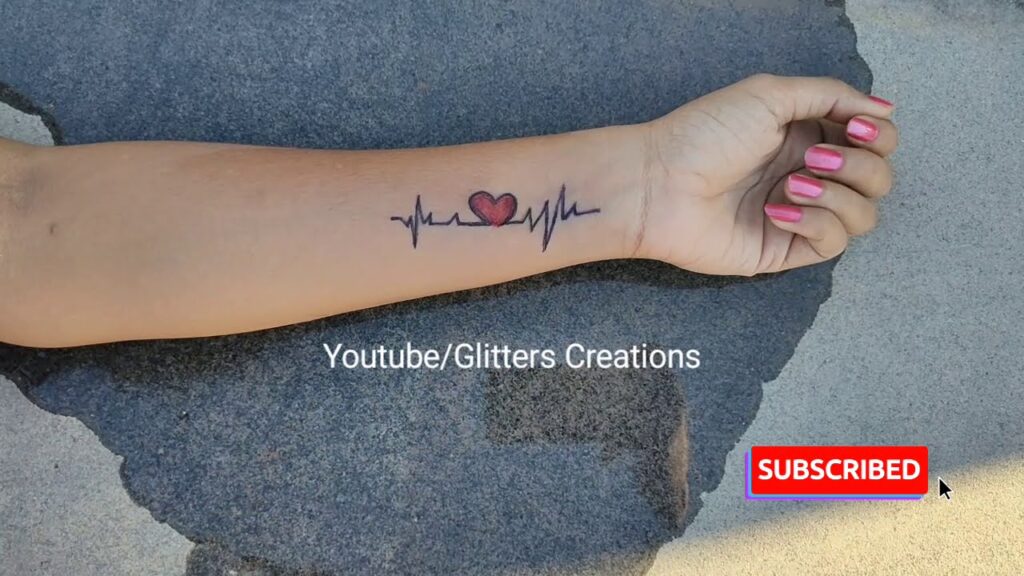
Geometric shapes like triangles, circles, and squares are easy to draw and can be arranged in various patterns. Stars, hearts, and diamonds are also classic and simple options.
Floral Motifs
Simple flowers, leaves, and vines are beautiful and relatively easy to create. Consider drawing a single daisy, a small bouquet of wildflowers, or a trailing vine around your wrist or ankle.
Tribal Patterns
Tribal-inspired designs often feature bold lines and geometric shapes. These can be adapted to create unique and eye-catching tattoos. [See also: Tribal Tattoo Meanings]
Words and Quotes
Short words or meaningful quotes can make for impactful tattoos. Choose a font that is easy to read and consider the placement of the tattoo carefully.
Animals and Insects
Simple animal silhouettes, such as birds, butterflies, or cats, are popular choices. You can also try drawing stylized insects, like ladybugs or dragonflies.
Abstract Designs
Don’t be afraid to experiment with abstract designs. Swirls, lines, and dots can be combined to create unique and expressive tattoos.
Extending the Lifespan of Your Sharpie Tattoo
While easy Sharpie tattoo designs are temporary, you can take steps to prolong their lifespan:
- Avoid Excessive Washing: Frequent washing will cause the ink to fade more quickly. Try to minimize washing the area where the tattoo is located.
- Pat Dry, Don’t Rub: When drying the area, gently pat it dry instead of rubbing it.
- Avoid Harsh Chemicals: Avoid using harsh soaps, lotions, or chemicals on the tattoo.
- Reapply as Needed: If the tattoo starts to fade, simply reapply the design.
Removing a Sharpie Tattoo
If you want to remove your Sharpie tattoo before it fades naturally, you can try the following methods:
- Rubbing Alcohol: Apply rubbing alcohol to a cotton ball and gently rub the tattoo until it fades.
- Hand Sanitizer: Hand sanitizer can also be effective at removing Sharpie ink.
- Baby Oil or Coconut Oil: These oils can help to loosen the ink and make it easier to remove.
- Makeup Remover: Some makeup removers are designed to remove stubborn pigments and may be effective at removing Sharpie ink.
- Exfoliating Scrub: Gently exfoliating the area can help to remove the top layer of skin and fade the tattoo.
Troubleshooting Common Issues
Here are some common issues you might encounter when creating easy Sharpie tattoo designs and how to resolve them:
- Smudging: Prevent smudging by outlining the design with petroleum jelly or moisturizer and allowing the ink to dry completely before touching it.
- Fading: Extend the lifespan of the tattoo by avoiding excessive washing and harsh chemicals.
- Irritation: If you experience any irritation, discontinue use immediately and wash the area with soap and water.
- Uneven Lines: Use a steady hand and practice on paper before applying the design to your skin.
The Allure of Temporary Tattoos
The appeal of easy Sharpie tattoo designs lies in their temporary nature. They provide a canvas for self-expression without the lifelong commitment of permanent ink. This allows for experimentation with various styles, placements, and designs, fostering creativity and self-discovery. For those considering a permanent tattoo, a Sharpie rendition can serve as a trial run, helping to solidify the decision and refine the design.
Beyond Sharpies: Exploring Other Temporary Tattoo Options
While Sharpies offer a readily available option, several other temporary tattoo alternatives exist, each with its own advantages and disadvantages.
- Henna: Henna tattoos use a natural dye derived from the henna plant. They typically last for one to three weeks and create a reddish-brown stain on the skin. Natural henna is generally safe, but avoid black henna, which can contain harmful chemicals.
- Jagua: Jagua tattoos use a dye derived from a tropical fruit. They last for one to two weeks and create a dark blue or black stain on the skin.
- Temporary Tattoo Stickers: These are pre-printed designs that are applied to the skin with water. They are easy to use and come in a wide variety of styles.
- Airbrush Tattoos: Airbrush tattoos use a special airbrush and non-toxic paint to create temporary designs. They typically last for a few days and can be customized with various colors and stencils.
Conclusion: Embrace the Temporary Art Form
Easy Sharpie tattoo designs provide a fun, creative, and accessible way to explore the world of body art. Whether you’re experimenting with different styles, testing out a design before getting a real tattoo, or simply enjoying a temporary aesthetic, Sharpie tattoos offer a versatile and expressive medium. Remember to prioritize safety by choosing skin-safe markers and testing them on a small area of skin before applying a larger design. With a little creativity and practice, you can create stunning temporary tattoos that reflect your unique personality and style.
