Mastering Mountain Majesty: A Comprehensive Guide to Painting Mountains with Acrylics
The allure of towering peaks and serene valleys has captivated artists for centuries. Painting mountains with acrylics offers a unique opportunity to capture their grandeur and translate the rugged beauty of nature onto canvas. This comprehensive guide will delve into the techniques, materials, and considerations necessary to create stunning mountain landscapes using acrylic paints. Whether you’re a seasoned artist looking to refine your skills or a beginner eager to embark on your artistic journey, this article provides a roadmap to achieving realistic and expressive mountain paintings.
Why Choose Acrylics for Mountain Painting?
Acrylic paints are a versatile and popular medium for artists of all levels. Their quick-drying nature, vibrant colors, and ability to be thinned or thickened make them ideal for capturing the diverse textures and atmospheric effects found in mountain landscapes. Unlike oils, acrylics are water-based, making them easier to clean up and less toxic. They also offer excellent lightfastness, ensuring your artwork will retain its vibrancy for years to come. Furthermore, acrylics can be used on a variety of surfaces, including canvas, wood, and paper, providing artists with flexibility in their creative process.
Essential Materials for Painting Mountains with Acrylics
Before you begin, gather the necessary materials. Having the right tools will significantly enhance your painting experience and contribute to the quality of your finished artwork.
- Acrylic Paints: A range of colors is essential. Start with basic colors like titanium white, lamp black, ultramarine blue, burnt umber, yellow ochre, and cadmium red. You can then mix these to create a wide spectrum of hues. Consider purchasing a few pre-mixed greens and blues to save time and effort.
- Canvas or Painting Surface: Choose a canvas or board of appropriate size for your project. Stretched canvas is a popular choice, but you can also use canvas panels or watercolor paper designed for acrylics.
- Brushes: A variety of brush shapes and sizes is crucial. Flat brushes are excellent for broad strokes and blending, while round brushes are ideal for detail work. Filbert brushes offer a balance between the two. Consider synthetic brushes for acrylics, as they are more durable and easier to clean.
- Palette: A palette is necessary for mixing your paints. A disposable palette is convenient, or you can use a reusable plastic or glass palette.
- Palette Knife: A palette knife is useful for mixing paints and applying thick layers of paint to create texture.
- Water Container: Keep a container of clean water nearby to rinse your brushes.
- Rags or Paper Towels: These are essential for cleaning brushes and wiping up spills.
- Easel (Optional): An easel can provide a comfortable and stable surface for painting.
- Mediums (Optional): Acrylic mediums can be added to your paints to alter their properties. For example, a glazing medium can create transparent layers, while a retarder can slow down the drying time.
Understanding Mountain Anatomy and Perspective
Before you start painting mountains with acrylics, it’s helpful to understand the basic anatomy of mountains and the principles of perspective. Mountains are not simply triangular shapes; they are complex geological formations with varying slopes, ridges, and valleys. Observing real mountains or photographs can help you understand their structure and how light and shadow play across their surfaces. Linear perspective, including atmospheric perspective, is crucial for creating a sense of depth in your paintings. Objects in the distance appear smaller, less detailed, and cooler in color.
Techniques for Painting Mountains with Acrylics
Several techniques can be employed when painting mountains with acrylics to achieve different effects.
Underpainting
An underpainting is a preliminary layer of paint that serves as a foundation for your final painting. It can help to establish the overall composition, value structure, and color harmony. A common approach is to use a thin wash of burnt umber or a similar earth tone to create a monochromatic underpainting.
Layering
Layering is a fundamental technique in acrylic painting. It involves applying thin, transparent layers of paint on top of each other to build up color and value. This technique is particularly useful for creating atmospheric effects and subtle gradations in color. When painting mountains with acrylics, layering can help to create a sense of depth and realism.
Dry Brushing
Dry brushing involves using a dry brush with a small amount of paint to create a textured effect. This technique is excellent for depicting rocky surfaces, snow-capped peaks, and other rough textures. Load your brush with a small amount of paint, wipe off the excess, and then lightly drag the brush across the canvas.
Blending
Blending is essential for creating smooth transitions between colors and values. You can blend acrylics by using a clean, damp brush to soften the edges of your brushstrokes. Alternatively, you can use a blending medium to extend the working time of your paints.
Glazing
Glazing involves applying thin, transparent layers of paint over a dry underpainting. This technique can be used to add depth and luminosity to your paintings. When painting mountains with acrylics, glazing can be used to create subtle variations in color and to enhance the atmospheric perspective.
Palette Knife Painting
Using a palette knife to apply paint can create a textured and expressive effect. Load the palette knife with paint and apply it to the canvas in thick, gestural strokes. This technique is excellent for depicting rocky surfaces and dramatic cloud formations. Experiment with different angles and pressures to achieve a variety of textures.
Step-by-Step Guide to Painting a Mountain Landscape with Acrylics
Let’s walk through a step-by-step process of painting mountains with acrylics. This guide assumes you’re working on a stretched canvas.
Step 1: Sketch the Composition
Lightly sketch the outline of your mountains and other landscape elements onto the canvas using a pencil. Pay attention to the composition and the placement of the horizon line. Consider the rule of thirds to create a visually appealing composition.
Step 2: Create an Underpainting
Mix a thin wash of burnt umber or a similar earth tone and apply it to the entire canvas. This will serve as your underpainting. Allow the underpainting to dry completely before proceeding.
Step 3: Establish the Value Structure
Begin to establish the value structure of your painting by adding darker tones to the shaded areas of the mountains and lighter tones to the areas that are illuminated by sunlight. Use a limited palette of grays and browns to simplify the process. Focus on creating a clear contrast between light and shadow.
Step 4: Add Color
Once you’ve established the value structure, begin to add color to your painting. Start with the sky, using a blend of blues and whites to create a sense of atmosphere. Then, add color to the mountains, using a variety of greens, browns, and blues to depict the different textures and surfaces. Remember to consider atmospheric perspective, using cooler and less saturated colors for the distant mountains.
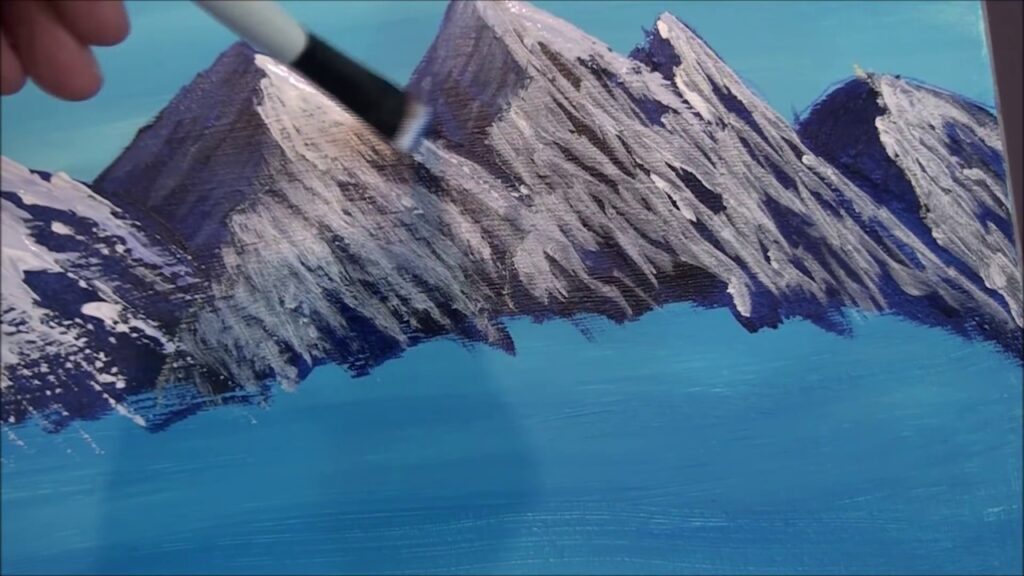
Step 5: Refine the Details
Once you’ve established the basic colors and values, begin to refine the details of your painting. Add highlights to the peaks of the mountains, using a light-colored paint and a small brush. Create texture by using dry brushing and palette knife techniques. Pay attention to the details of the foreground, adding rocks, trees, and other elements to create a sense of depth and realism.
Step 6: Add Atmospheric Effects
Enhance the atmospheric perspective by adding subtle glazes of color to the distant mountains. Use a thin wash of blue or purple to create a hazy effect. Add clouds to the sky, using a blend of whites and grays. These atmospheric touches will enhance the sense of depth and realism in your painting.
Step 7: Final Touches
Step back from your painting and assess the overall effect. Make any necessary adjustments to the colors, values, and details. Add any final touches that will enhance the composition and the overall impact of your artwork. Once you’re satisfied, allow the painting to dry completely.
Tips for Painting Realistic Mountains
- Observe Nature: Study real mountains or photographs of mountains to understand their structure, texture, and color.
- Use Reference Photos: Don’t be afraid to use reference photos to guide your painting.
- Simplify the Scene: Break down the complex shapes and textures of the mountains into simpler forms.
- Focus on Values: Pay attention to the values (light and dark) in your painting, as they are crucial for creating a sense of depth and form.
- Experiment with Techniques: Don’t be afraid to experiment with different techniques, such as dry brushing, glazing, and palette knife painting.
- Practice Regularly: The more you practice, the better you will become at painting mountains with acrylics.
Common Mistakes to Avoid
- Ignoring Perspective: Failing to use perspective correctly can make your mountains look flat and unrealistic.
- Using Too Much Detail: Overworking the details can make your painting look cluttered and confusing.
- Using the Wrong Colors: Using colors that are too bright or saturated can make your mountains look unnatural.
- Not Creating Enough Contrast: Insufficient contrast between light and shadow can make your painting look flat and dull.
- Rushing the Process: Painting mountains with acrylics takes time and patience. Don’t rush the process, and take breaks when needed.
Adding Unique Elements to Your Mountain Paintings
While realism is a worthy goal, don’t be afraid to infuse your mountain paintings with your own unique artistic style. Consider adding elements of fantasy or surrealism to create a more imaginative and expressive artwork. You could incorporate unusual color palettes, abstract shapes, or symbolic imagery. The key is to find a balance between realism and personal expression.
The Importance of Light and Shadow
Light and shadow are crucial elements in any painting, but they are particularly important when painting mountains with acrylics. The way light falls across the mountains can dramatically alter their appearance, creating a sense of depth, volume, and atmosphere. Pay close attention to the direction and intensity of the light source, and use a variety of values to depict the subtle gradations of light and shadow. Experiment with different lighting conditions, such as sunrise, sunset, and moonlight, to create a range of moods and effects.
Conclusion
Painting mountains with acrylics is a rewarding and challenging artistic endeavor. By understanding the basic techniques, materials, and considerations outlined in this guide, you can create stunning mountain landscapes that capture the beauty and grandeur of nature. Remember to practice regularly, experiment with different approaches, and most importantly, have fun. With dedication and perseverance, you can master the art of painting mountains with acrylics and create artwork that you are proud of. [See also: Acrylic Painting Techniques for Beginners] and [See also: Landscape Painting Ideas]. Don’t be afraid to explore different styles and techniques to find what works best for you. The possibilities are endless when it comes to painting mountains with acrylics, so let your creativity soar and capture the majesty of the mountains on canvas. Continue to hone your skills in painting mountains with acrylics by exploring advanced techniques and studying the works of master landscape painters. Embrace the journey and enjoy the process of creating beautiful mountain scenes with acrylics. The art of painting mountains with acrylics is a journey of continuous learning and refinement. Embrace the challenges, celebrate the successes, and continue to explore the endless possibilities of this captivating medium.
