Patio Chair Repair: Breathe New Life into Your Mesh Seating
Outdoor furniture, especially patio chairs, endures a lot. Sun, rain, wind – it all takes a toll. One of the most common casualties is the mesh seating. Tears, sags, and general wear and tear can make your once-comfortable patio chairs an eyesore and a backache waiting to happen. But don’t despair! Patio chair repair, specifically focusing on patio chair repair mesh, is often a viable and cost-effective alternative to replacing the entire set. This article will guide you through the process, helping you decide if patio chair repair mesh is right for you and providing the necessary steps to get the job done.
Is Patio Chair Repair Mesh the Right Solution?
Before diving into the how-to, let’s assess the situation. Ask yourself these questions:
- What’s the overall condition of the chair frame? If the frame is rusted through, severely damaged, or beyond repair, replacing the chair might be the better option.
- Is the mesh the only problem? Check for other issues like loose joints, wobbly legs, or damaged armrests. These might require additional repairs.
- Are you comfortable with a DIY project? Patio chair repair mesh can be a rewarding project, but it requires some patience and basic tools. If you’re not comfortable with DIY, consider hiring a professional.
If the frame is sound and the mesh is the primary issue, then patio chair repair mesh is definitely worth considering. It’s a sustainable and economical way to extend the life of your outdoor furniture.
Gathering Your Tools and Materials for Patio Chair Mesh Repair
Having the right tools and materials is crucial for a successful patio chair repair mesh project. Here’s a list of essentials:
- Replacement Mesh: This is the heart of the repair. Choose a high-quality, UV-resistant mesh specifically designed for outdoor furniture. Measure the existing mesh carefully to ensure you purchase the correct size. Consider factors like color and material. Phifertex is a popular and durable option.
- Spline: The spline is the flexible cord that holds the mesh in place within the chair frame’s groove. You’ll need to purchase new spline that matches the size of the original.
- Spline Roller Tool: This tool is essential for pressing the spline into the groove. A good spline roller will make the process much easier and prevent damage to the mesh.
- Scissors or Utility Knife: For trimming the mesh.
- Measuring Tape: For accurate measurements.
- Screwdriver or Allen Wrench: Depending on how your chair is constructed, you may need these to disassemble and reassemble parts of the frame.
- Safety Glasses: Protect your eyes from flying debris.
- Gloves: Protect your hands.
Step-by-Step Guide to Patio Chair Repair Mesh
Now, let’s get down to the actual repair. Here’s a detailed, step-by-step guide to patio chair repair mesh:
Step 1: Removing the Old Mesh
Carefully remove the old mesh. This usually involves prying out the old spline with a screwdriver or utility knife. Be cautious not to damage the frame. Once the spline is removed, the old mesh should come out easily. Dispose of the old mesh and spline properly.
Step 2: Cleaning the Frame
Thoroughly clean the chair frame. Remove any dirt, debris, or rust. Use a wire brush to remove stubborn rust spots. You can also use a mild soap and water solution to clean the frame. Allow the frame to dry completely before proceeding.
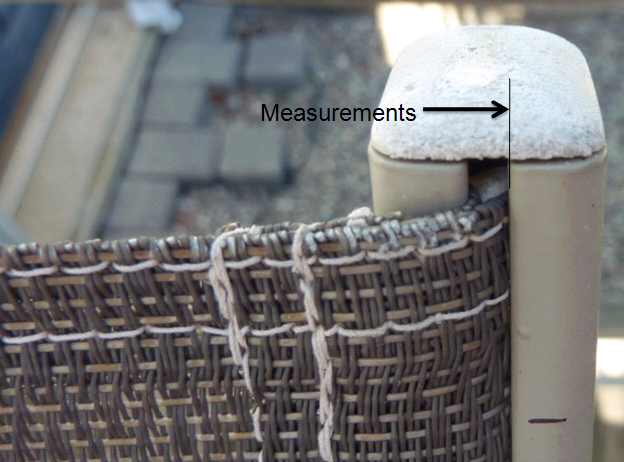
Step 3: Measuring and Cutting the New Mesh
Carefully measure the area where the mesh will be installed. Add a few extra inches to each side for overlap. Use sharp scissors or a utility knife to cut the new mesh to the correct size. Accuracy is key here, so double-check your measurements before cutting.
Step 4: Installing the New Mesh and Spline
This is the most crucial step. Start by aligning the mesh with the frame. Use the spline roller tool to press the spline into the groove, securing the mesh in place. Work your way around the entire frame, ensuring the mesh is taut and evenly distributed. This step requires patience and attention to detail. Make sure the mesh is not too tight, as this can cause it to tear. It should be snug and supportive but with a little give.
Step 5: Trimming Excess Mesh
Once the mesh is securely in place, trim any excess mesh around the edges. Use sharp scissors or a utility knife for a clean cut. Be careful not to cut the spline.
Step 6: Reassembling the Chair (If Necessary)
If you disassembled the chair frame for the repair, reassemble it now. Make sure all screws and bolts are tightened securely.
Tips for a Successful Patio Chair Repair Mesh Project
Here are some additional tips to ensure your patio chair repair mesh project is a success:
- Watch instructional videos: There are many helpful videos online that demonstrate the patio chair repair mesh process. Visual aids can be extremely beneficial.
- Practice on a small section first: If you’re unsure about the process, practice on a small, inconspicuous area of the chair first.
- Take your time: Don’t rush the repair. Patience and attention to detail are key.
- Use high-quality materials: Investing in high-quality mesh and spline will ensure a longer-lasting repair.
- Consider a professional: If you’re not comfortable with DIY, don’t hesitate to hire a professional furniture repair service.
Choosing the Right Mesh for Your Patio Chair Repair
The type of mesh you choose for your patio chair repair is critical. Here’s a breakdown of common types and their characteristics:
- Polyester Mesh: A popular and affordable option. Polyester mesh is durable, UV-resistant, and easy to clean.
- Olefin Mesh: Olefin mesh is known for its excellent resistance to fading, staining, and mildew. It’s a good choice for humid climates.
- PVC-Coated Polyester Mesh: This type of mesh is extremely durable and weather-resistant. It’s a good choice for high-traffic areas.
- Textilene Mesh: Textilene is a brand name for a strong, durable, and fade-resistant woven mesh made from PVC-coated polyester yarns. It’s a premium option known for its longevity.
Consider the climate, the amount of use the chair will get, and your budget when choosing the right mesh.
Maintaining Your Repaired Patio Chairs
Once you’ve completed your patio chair repair mesh, proper maintenance is essential to prolong the life of your chairs. Here are some tips:
- Clean regularly: Wipe down the mesh regularly with a mild soap and water solution to remove dirt and debris.
- Protect from the elements: When not in use, cover your patio chairs to protect them from the sun, rain, and wind.
- Store properly: During the off-season, store your patio chairs in a dry, covered area.
- Inspect regularly: Periodically inspect the mesh for any signs of wear and tear. Address any issues promptly to prevent further damage.
The Environmental Benefits of Patio Chair Repair
Choosing patio chair repair mesh over replacement is an environmentally responsible decision. It reduces waste, conserves resources, and minimizes your carbon footprint. By repairing your existing furniture, you’re keeping it out of landfills and extending its lifespan. This reduces the demand for new furniture, which requires energy and resources to manufacture and transport.
Cost Savings of Patio Chair Repair Mesh
Replacing an entire patio furniture set can be expensive. Patio chair repair mesh offers significant cost savings. The cost of replacement mesh, spline, and a few basic tools is typically far less than the cost of a new chair or set. Plus, you’ll save on delivery fees and disposal costs.
When to Consider Professional Patio Chair Repair
While patio chair repair mesh is a manageable DIY project for many, there are times when it’s best to call in the professionals. Consider professional repair if:
- You’re not comfortable with DIY: If you lack the skills or confidence to tackle the project yourself, don’t hesitate to seek professional help.
- The chair frame is damaged: If the frame requires welding, extensive repairs, or specialized tools, a professional is your best bet.
- You want a guaranteed result: Professional repair services typically offer warranties on their work.
- You have multiple chairs to repair: Repairing multiple chairs can be time-consuming. A professional can complete the job quickly and efficiently.
By carefully considering these factors, you can make an informed decision about whether to DIY or hire a professional for your patio chair repair mesh project. [See also: Outdoor Furniture Maintenance Tips] [See also: Choosing the Right Patio Furniture]
Conclusion: Giving Your Patio Chairs a Second Life
Patio chair repair mesh is a practical, cost-effective, and environmentally friendly way to revive your worn-out outdoor furniture. By following the steps outlined in this article, you can breathe new life into your patio chairs and enjoy them for many years to come. So, don’t throw away those old chairs! With a little effort and the right materials, you can transform them into comfortable and stylish seating once again. Remember to choose high-quality mesh, take your time, and don’t be afraid to ask for help if you need it. Happy repairing!
